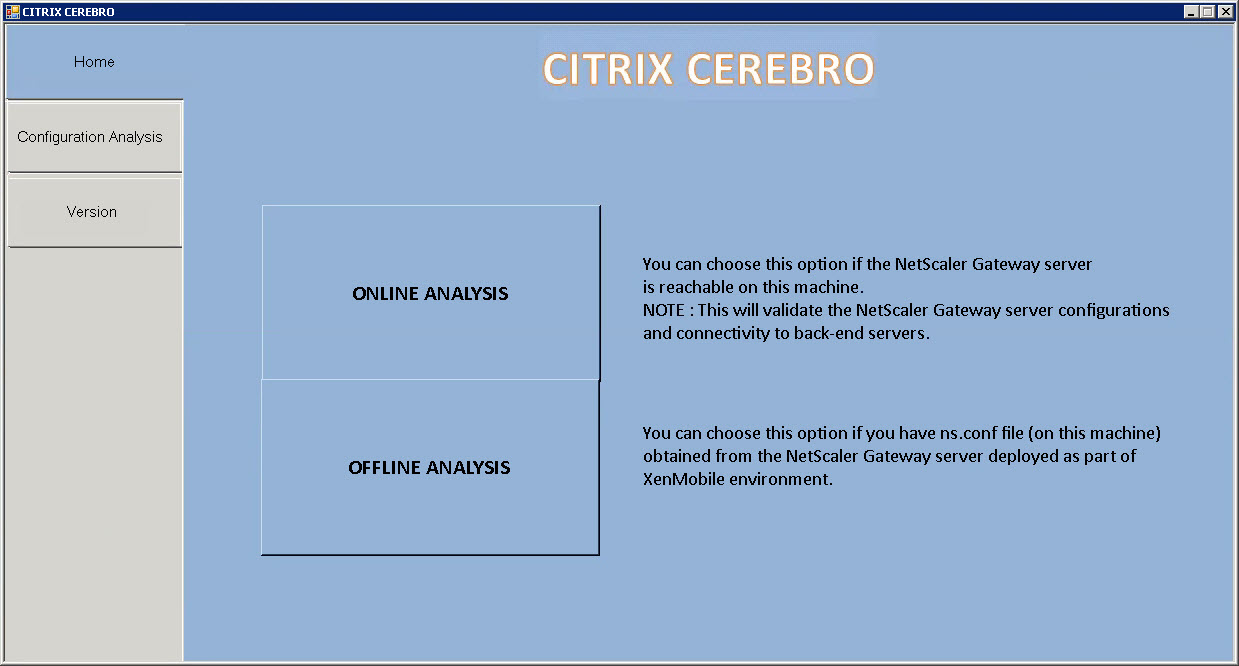
As I’m always thankful for any tool that might come in handy during troubleshooting sessions I thought that this might be interesting for you NetScaler/XenMobile guys as well. Just recently I stumbled upon this neat little article: CTX141060 – Citrix Cerebro – XenMobile Troubleshooting Tool and the tool it provides: Citrix Cerebro (what kind of name is that actually?):
This quite comprehensive article explains the tool’s core functionality pretty well, so there’s not much to add right now. Therefore I simply share my experience here while using this tool in order to troubleshoot some XenMobile issues I had just recently: Access to your company network is not currently available while setting up WorxMail.
Starting with Citrix XenDesktop 7.x there have been some features that have been deprecated by Citrix, such as LPT and COM Port Mapping, which are not working as expected or properly after upgrading to VDA 7.x. I stumbled upon this quite annoying issue as soon as I upgraded my existing Citrix XenApp servers to the latest XenDesktop 7.x, i.e. Hosted Shared Desktops with Virtual Desktop Agents v7.x.
During implementing quite some XenMobile 10.x solutions in the last couple of months I came across some issues that caused quite some headaches. Therefore I’d like to document and share my lessons learned in this new blog.
As all my implementations were with existing NetScaler 10.x configurations already in place, I was not able to follow all those XenMobile 10.x installation and configuration guides out there by the book. All of those blogs and guides have one thing in common: they assume your start from scratch with both XenMobile 10.x and NetScaler 10.x and thus miss the point in merging XenMobile 10.x requirements with NetScaler 10.x, i.e. adding all those nasty MDM/MAM LB VIPs, DNS records, firewall rules, certificates, Session Policies and Profiles, et al.
I’m trying to shed some light on how to add a new XenMobile 10.x installation to an already existing NetScaler Gateway configuration.
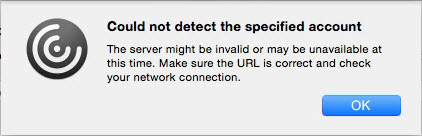
All of a sudden my Mac users started complaining that they are unable to connect to or add a new Store to Citrix Receiver for Mac. Right after entering the NetScaler’s URL and hitting Add, they receive an error stating “Could not detect the specified account” and “The server might be invalid or may be unavailable at this time. Make sure the URL is correct and check your network connection.”
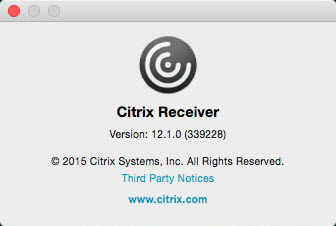
Nothing has been changed. Receiver for Mac was the latest version v12.1. No network issues, Safari works just well, navigating to the NetScaler URL, entering credentials, and launching a Citrix session. No certificate issues. Nothing, just as expected. I tried the script as mentioned here, but to no prevail.
Solution:
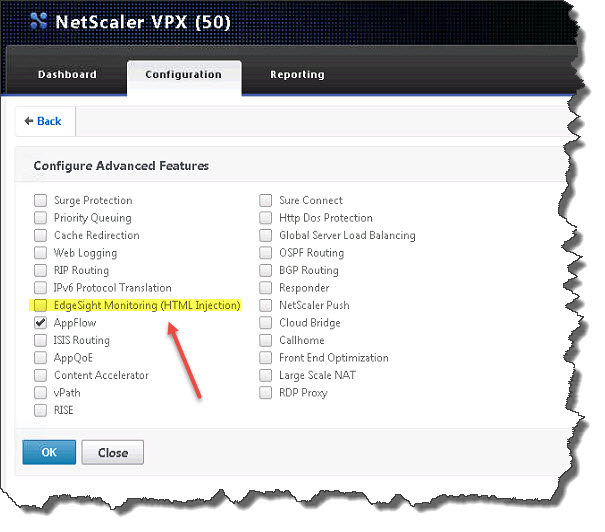
As all users came in from external networks through NetScaler, I had to disableEdgeSight Monitoring (HTML Injection) in NetScaler’s System | Settings | Configure Advanced Features:
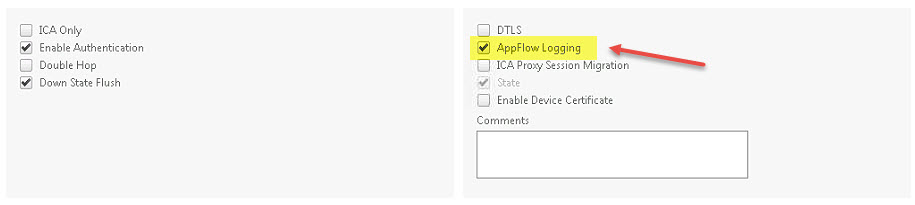
In my case I didn’t have to disableAppFlow on my NetScaler’s vServer as described by other users having the same issue. It already worked for me after disablingHTML Injection alone:
The same goes for having issues while connecting with Citrix Receiver for Android, receiving an error stating “An error has occurred while connecting. Check your server address and data connection”. Have a look at Jason Samuel’s blog article as well.
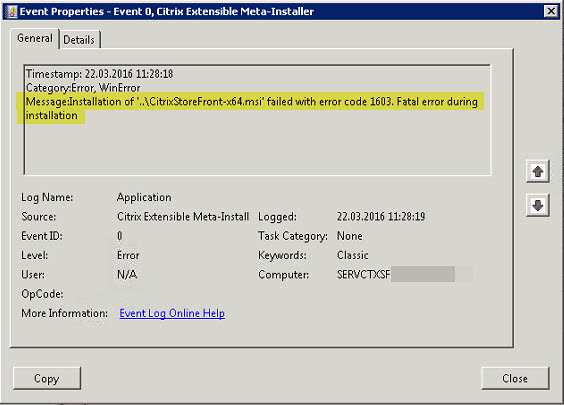
Citrix StoreFront – Upgrade v3.0.0.45 to v3.5.0.23 fails and the Application Event Log shows an Event ID 0, Source: Citrix Extensible Meta-Installer, stating:
Timestamp: 22.03.2016 11:28:18
Category:Error, WinError
Message:Installation of ‘..\CitrixStoreFront-x64.msi’ failed with error code 1603. Fatal error during installation
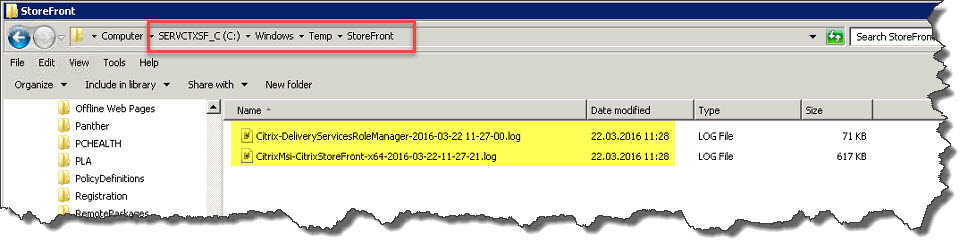
With an failed upgrade log files can be found in C:\Windows\Temp\StoreFront\, e.g.:
Installer can have issues in converting/migrating the custom configuration you might have put in. Although it may be pointing to Authentication however its possible that issues are in STORE\Web.config file.
So I checked my own web.config file, placed in C:\inetpub\wwwroot\Citrix\StoreWeb, but didn’t find any refernces to any bogus, e.g. generatePublisherEvidence, which might have been put there working with an earlier version of StoreFront:
Per Citrix Support: This was a setting that was in place for web interface, some customers may have had this implemented and once updated may have copied their web.config files over as well. This setting was not tested with Storefront and is the reason why the installer fails because its not a standard in the XML file.
Furthermore it’s suggested to check any custom configurations you may have applied to your StoreFront setup, i.e.
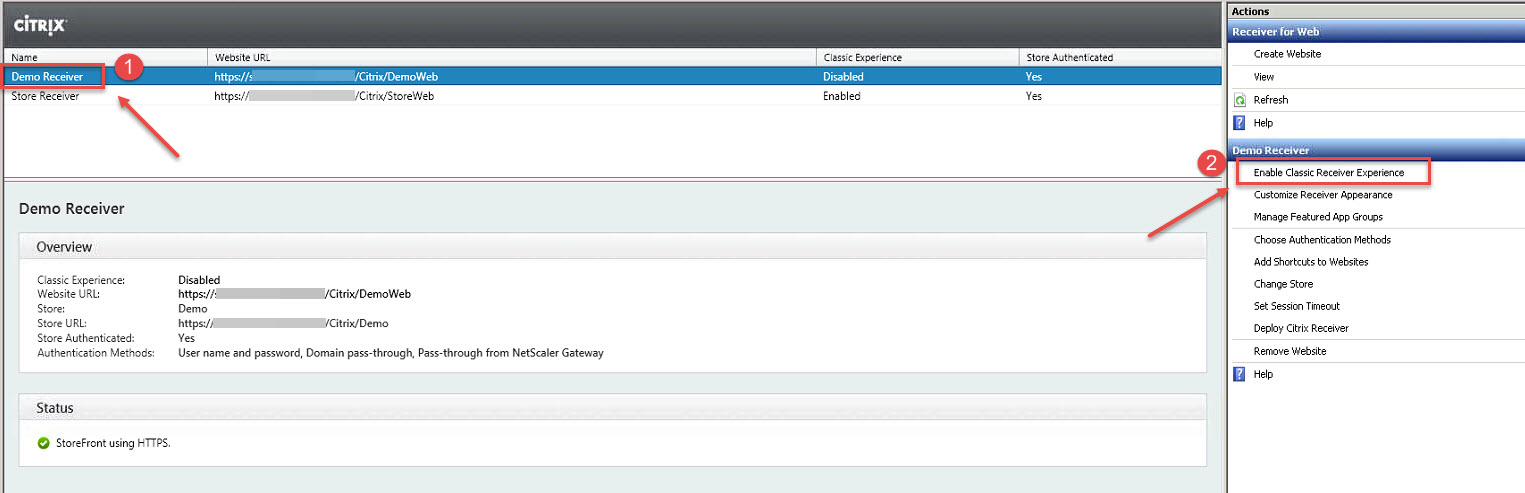
Customize Receiver Appearance
Manage Featured App Groups
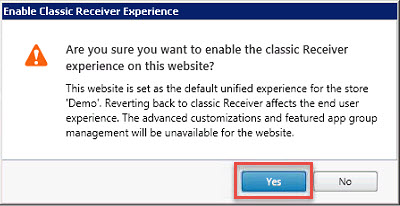
I reverted any of my StoreFront’s Stores to Classic Experiences (which saw me losing my Enhanced Experience and Featured App Groups settings flushed down the drain in the process), but to no prevail:
I had the same 1603 error when trying to do an in-place upgrade from StoreFront 3.0.0.45 to 3.5.0.23. Tried several reboots and many other troubleshooting steps including all suggestions above, but what worked for me in the end was to install 3.0.1.57 first, reboot, then install 3.5.0.23 on top of that.
This left me with the only choice that seems to work right now, but…. it did not work for me!
For valid upgrade paths to the latest StoreFront v3.5 have a look at Citrix eDocs.
Solution
As the aforementioned error code 1603 is generated by the MSI installer technology and thus not Citrix specific, I dug deeper into that error code and found CTX126640:
Note: The 1603 exit error is a generic installation error which stands for Fatal error during installation. Refer to the MSI installation logs for further traces because this problem does not apply to every situation.
Problem Cause
A previous installation of a Microsoft Visual C++ Redistributable package may cause the installation process to fail.
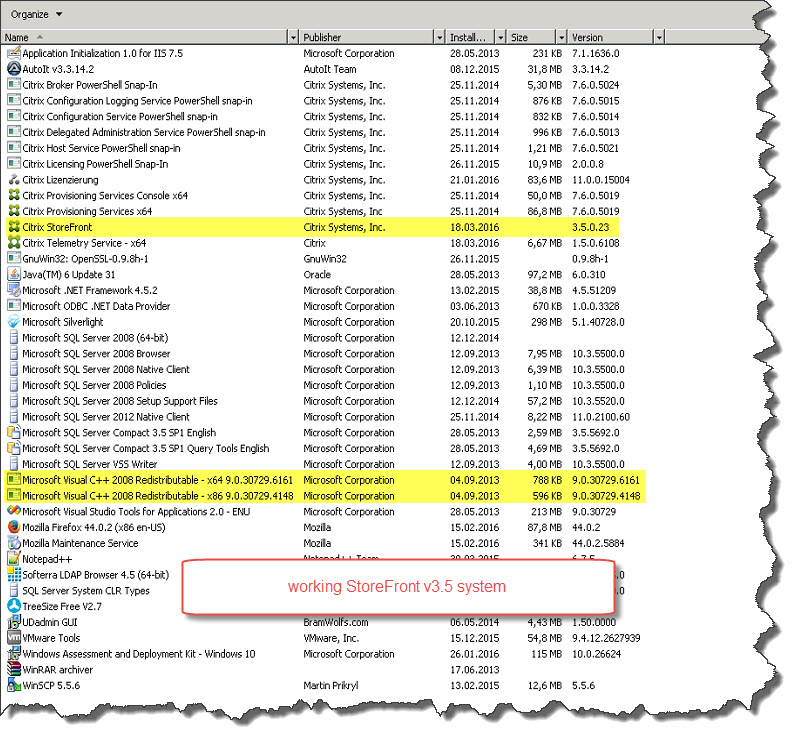
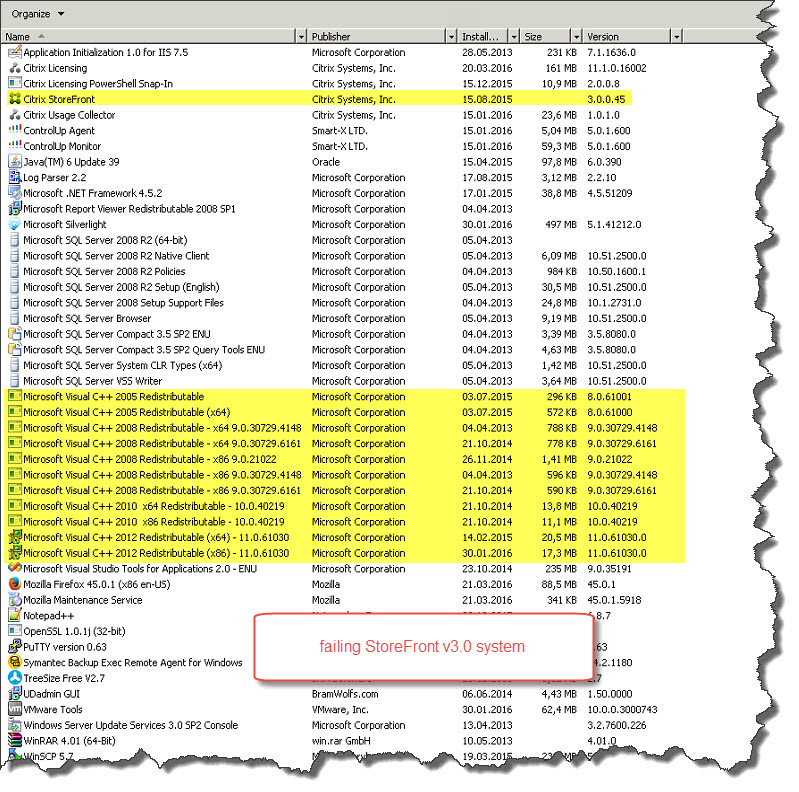
I compared a working StoreFront v3.5 setup with my failing v3.0 setup and identified several Microsoft Visual C++ 2008 Redistributable packages installed on the failing system:
I decided to remove any of the Microsoft Visual C++ 2008 Redistributable packages and launched the StoreFront v3.5 upgrade executable once more – ét voila! It worked! Problem solved.
When non-Windows Receivers connect to a Windows 2012 Server with Universal Print Driver (UPD) options configured for client printers, the Post-script (PS) and PCL drivers might not be available, therefore the printers will not get auto-created. As a workaround, to use the Citrix UPD for non-window Receivers, like Mac and Linux, install appropriate drivers on the server manually:
PS driver = HP Color LaserJet 2800 Series PS
PCL4 driver = HP LaserJet Series II
PCL5c driver = HP Color LaserJet 4500 PCL 5
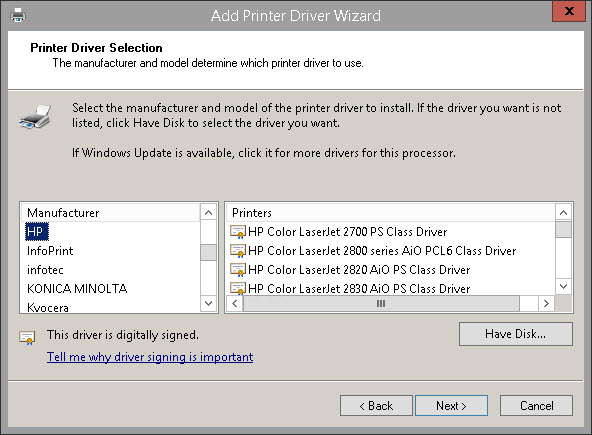
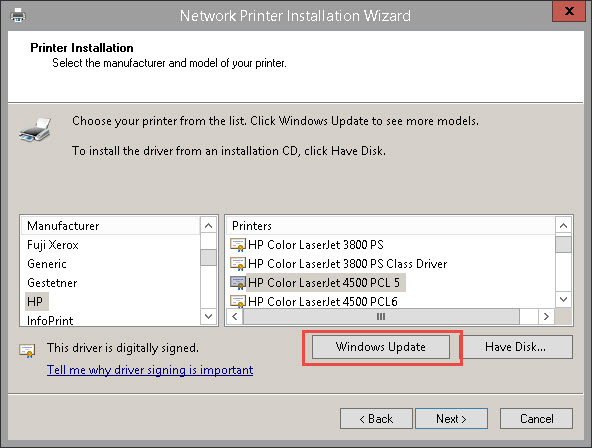
With my Windows Server 2012 R2 I ran into some issues. While trying to add the aforementioned Printer Drivers manually I realized that something was wrong:
As you can see from the screenshot the button Windows Update is unavailable. This left me with investigating why that is the case. After a little bit of research I ended up with two possible solutions:
Configure the corresponding registry settings for Windows Update
Install a local printer and chose the appropiate model/driver as listed above
Configure Windows Update via Registry:
Run registry editor. Click Start then type regedit and press Enter
Navigate to HKEY_LOCAL_MACHINE\SOFTWARE\Policies\Microsoft\Windows\DriverSearching
Change value of REG_DWORD DontSearchWindowsUpdate to 0
Change value of REG_DWORD DontPromptForWindowsUpdate to 0
Run a Command Prompt. Click Start then type cmd and press Enter
HKLM\Software\Policies\Microsoft\Windows\DriverSearching – REG_DWORD – searchorderConfig = 0
This removes that Windows Update button from the Add Printer Wizard. You can either set this key to “2”, or just delete the key to restore the Windows Update button.
This is the “Disable automatic updates of drivers from Windows Updates” feature above.
Install printer locally:
Whereas adding just the required drivers left me with no Windows Update button to click, I found this article pointing me in the right direction:
I had the same issue, but found it only occurred when I was trying to add a network printer. When I try to add a local printer the button shows up. So….. I installed a local printer, allowed Windows Update to download the new drivers and then deleted the local printer. Next I add the network printer again, but this time, because the list of drivers has been refreshed, I didn’t need the Windows Update button because my printer is now in the list.
Upon reading CTX140208 once more it became obvious and clear that I didn’t read the article with the required attention to detail, as it clearly states:
From the Windows Server 2012, choose Add a printer from Devices and Printers.
Continue through the wizard as if you are adding a local printer though it is not attached.
Click Add a local printer > select LPT1: (Printer Port) > click Windows Update.
Silly me!
2015-11-09 Update:
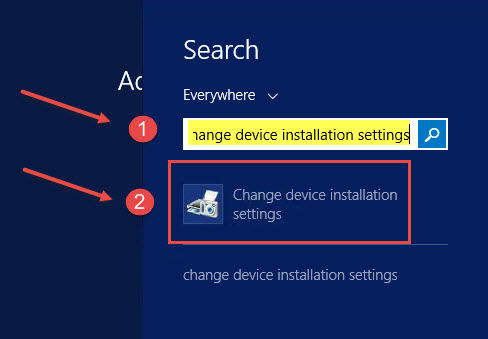
As Alexander Gassner pointed out here I could have checked my Device Installation Settings as well, as they tend to prohibit the Windows Update functionality too:
either go for Control Panel | Change Device Installation Settings
or search for Change Device Installation Settings
Select both No, let me choose what to do + Always install the best driver software from Windows Update
and hit Save Changes
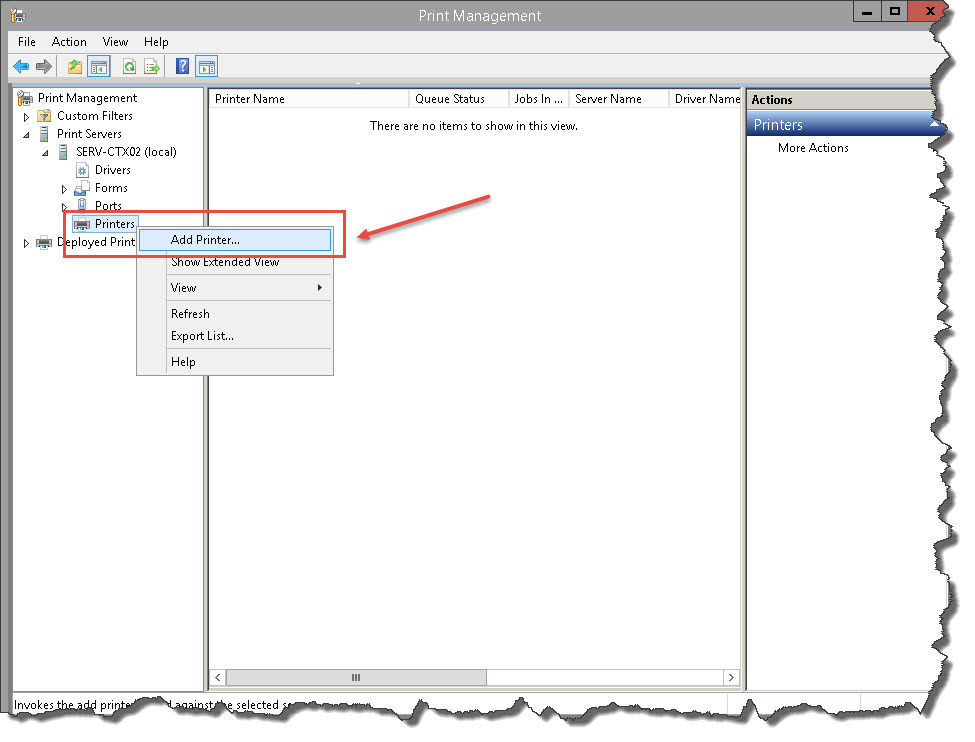
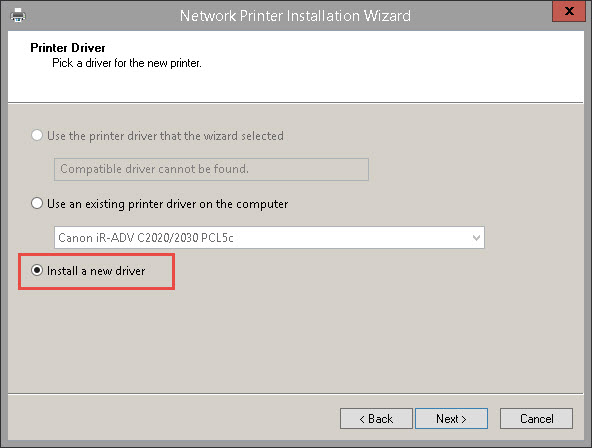
I launched Print Management console, drilled down to the Printers node, right-clicked it and chose Add Printer:
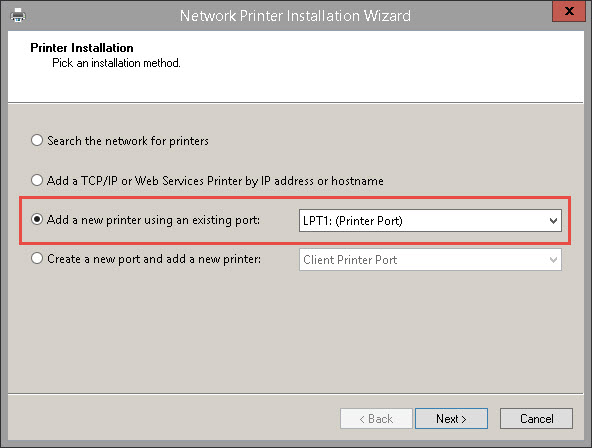
Then selected Add a new printer using an existing port with LPT1:
Then selected Install a new driver:
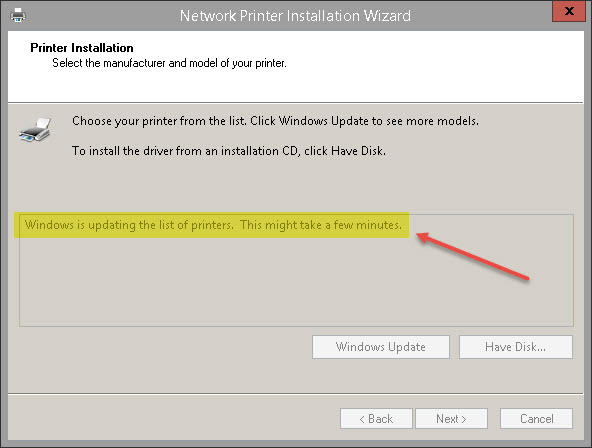
The Windows Update button was finally there, I hit it, and waited for the updated drivers to get downloaded:
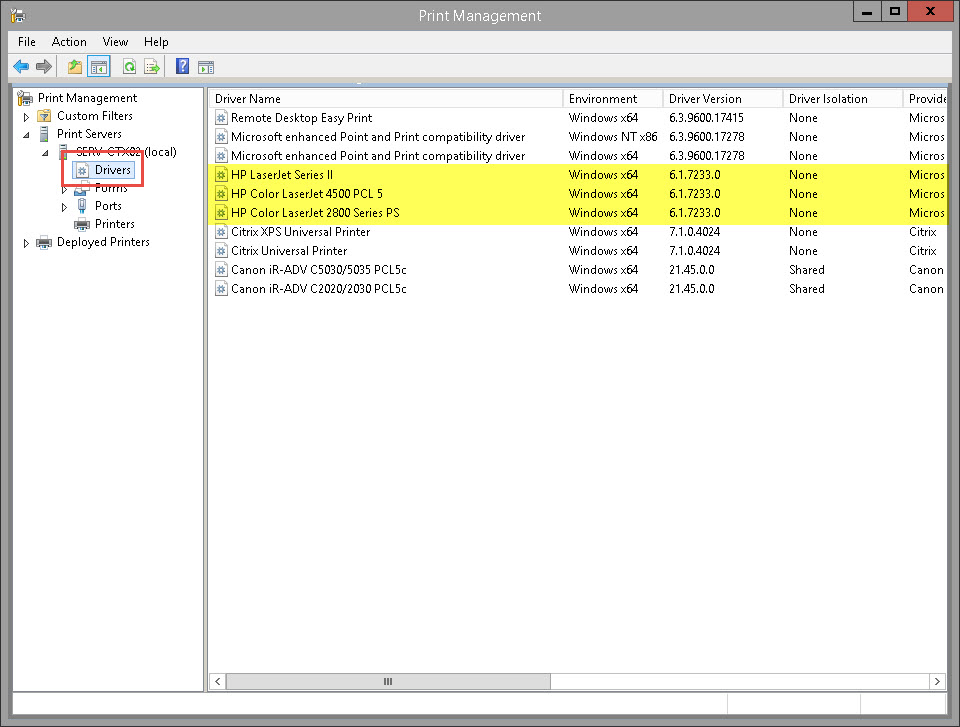
Afterwards I was able to select the required drivers and install the required printers:
As Citrix pointed out in CTX139020, “if there are two versions of this driver displayed, choose the Microsoft version“.
Almost everybody has struggled with the now infamous Error 1030 (The connection to “ApplicationName” failed with status (1030)) when connecting with Citrix Receiver for Windows to XenDesktop through NetScaler and StoreFront. There even is an whole armada of articles available out there, totally dedicating their content to troubleshooting this quite generic network error indicating that the connection has failed. Just google it!
To provide the best experiences, we use technologies like cookies to store and/or access device information. Consenting to these technologies will allow us to process data such as browsing behavior or unique IDs on this site. Not consenting or withdrawing consent, may adversely affect certain features and functions.
Functional
Always active
The technical storage or access is strictly necessary for the legitimate purpose of enabling the use of a specific service explicitly requested by the subscriber or user, or for the sole purpose of carrying out the transmission of a communication over an electronic communications network.
Preferences
The technical storage or access is necessary for the legitimate purpose of storing preferences that are not requested by the subscriber or user.
Statistics
The technical storage or access that is used exclusively for statistical purposes.The technical storage or access that is used exclusively for anonymous statistical purposes. Without a subpoena, voluntary compliance on the part of your Internet Service Provider, or additional records from a third party, information stored or retrieved for this purpose alone cannot usually be used to identify you.
Marketing
The technical storage or access is required to create user profiles to send advertising, or to track the user on a website or across several websites for similar marketing purposes.
")