If you want to use your NetScaler for all things that need to be accessible from the outside, over a single IP address, that poses an issue. As is usually a problem with small to medium sized businesses which only have one public IP address at their disposal, and need to implement features like a fully functional RDS environment (with RD Web Access, RD Gateway, etc), a XenApp/XenDesktop evnironment with StoreFront, and even AD FS, say, for Office365. Generally all these services require port 443 (https) to be fully functional, and you can only set up one distinctive IP address on your NetScaler providing this service, pointing it to your internal resources via Firewall rules, thus leaving you with only one option: NetScaler’s Unified Gateway and Content Switching features.
In this case keep in mind that we’re not talking about NetScaler’s native RDP Proxy feature as described by Carl Stalhood in his article here. Instead we’re utilizing Content Switching and Unified Gateway features in order to use NetScaler as a frontend for your RDS Gateway and RDWeb, and pass traffic through NetScaler to your internal network, thus allowing you to successfully establish RDP sessions to Published Remote Apps from external networks with NetScaler.
Again, courtesy of Trond Eirik Haavarstein and Dave Brett, without whom this article wouldn’t have been possible in the first place!
This article can be considered a continuation of my previous article Citrix NetScaler v11 – How to setup your NetScaler as an AD FS proxy , and is partly based on requirements and configuration steps described there.
I verified and tested all these settings with Windows Server 2012 R2, a public Server Certificate issued by StartCom, and NetScaler v11.1 48.10nc.
Requirements on the Microsoft side of things
- a fully working and functional RD Gateway and RDWeb deployment,
- with corresponding Server Certificate in place,
- and a secondary IP address and corresponding binding in IIS with SNI enabled (in my case for AD FS and RDWeb, respectively),
- adjust my RDPublishedName via Set-RDPublishedName.ps1 script.
Requirements on NetScaler
- as well as NetScaler SNI Feature enabled,
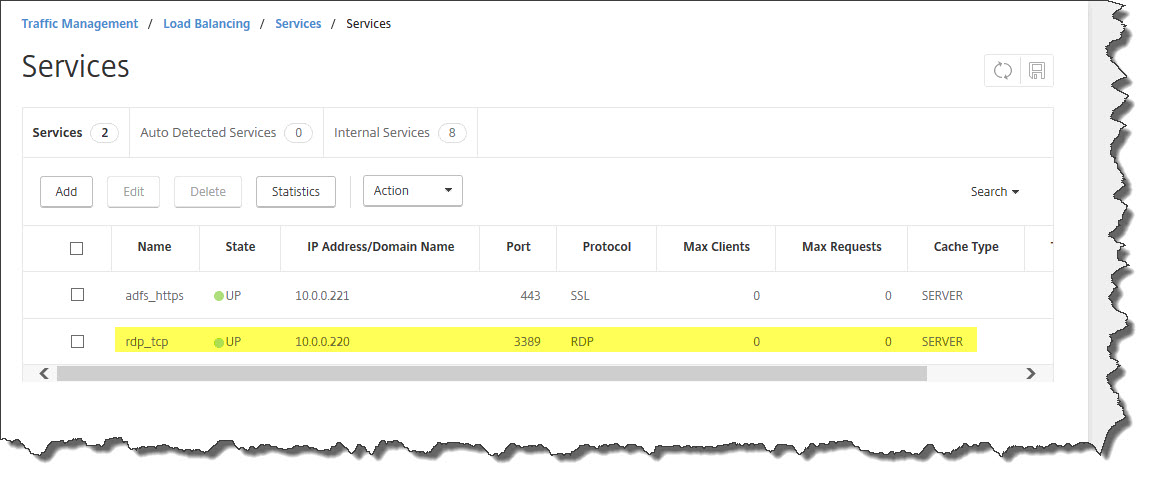
- RDP Load Balancing vServer (Port 3389),
- internal and external DNS Records adjusted accordingly.
In order to successfully get RDS up and running on my existing AD FS server I did the following:
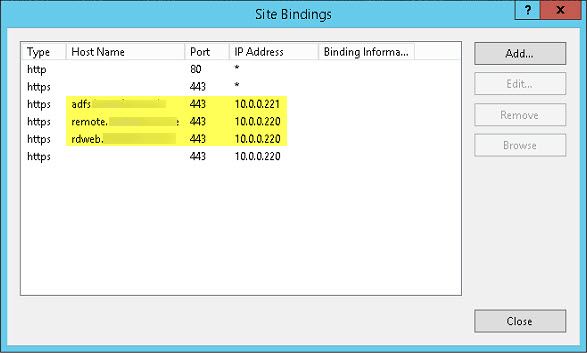
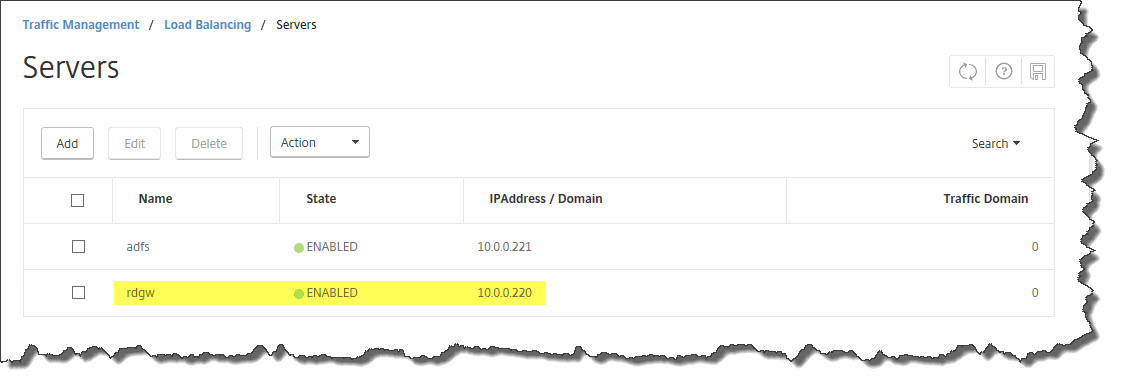
- added a second IPv4 address to the server to represent each https service seperately, i.e. 10.0.0.221 for AD FS, and 10.0.0.220 for RDS, respectively:

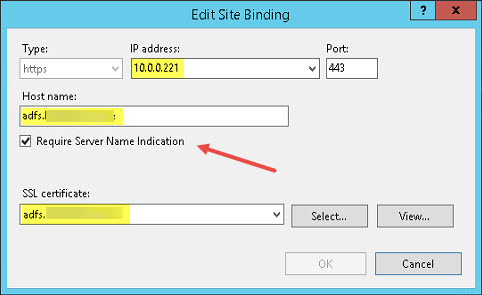
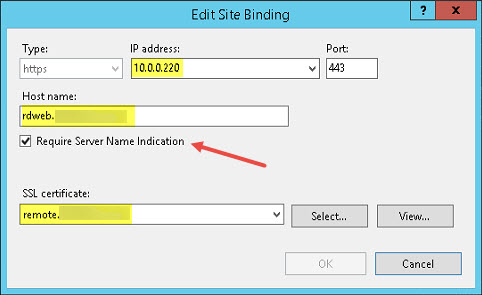
- enabled IIS SNI support on my Default Web Site by adding corresponding Server Certificates to Site Bindings:
- configured IIS Site Bindings for my Default Web Site to use those IPv4 addresses, i.e. 10.0.0.221 for AD FS, and 10.0.0.220 for RDS, respectively:
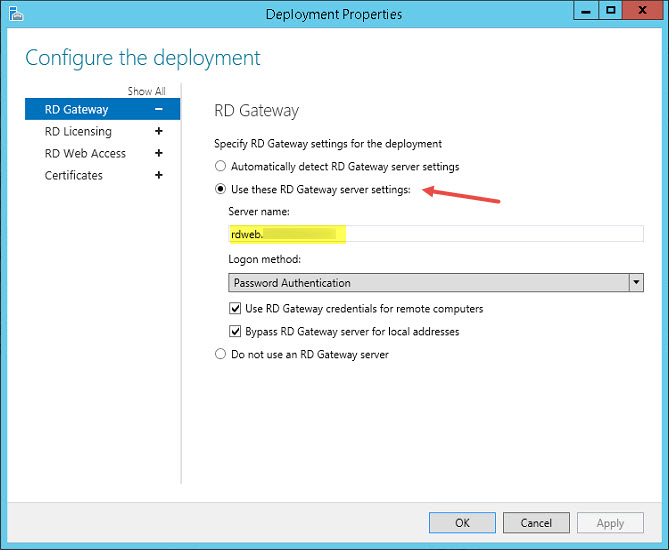
- configured my RDS Deployment Properties to represent the Server Certificate’s FQDN as Server Name and selected the corresponding Server Certificate for its Role Services:
- RD Connection Broker – Enable Single Sign On
- RD Connection Broker – Publishing
- RD Web Access
- RD Gateway
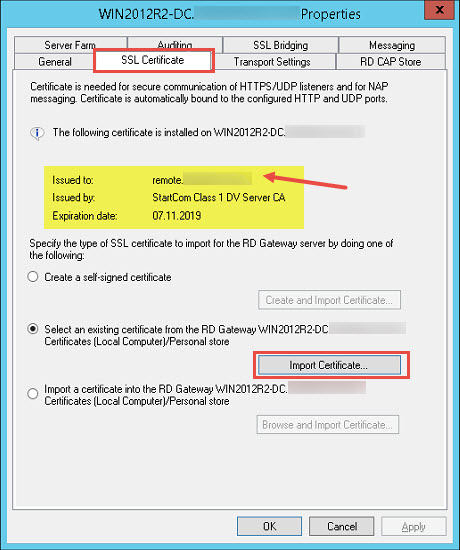
- adjusted my RDS Server Properties within RD Gateway Manager console to use the corresponding Server Certificate representing my deployment’s public FQDN (SSL Certificate tab):
- enabled UDP Transport in my RDS Server Properties (Transport Settings tab):
- and adjusted my RDPublishedName via Set-RDPublishedName.ps1 script:
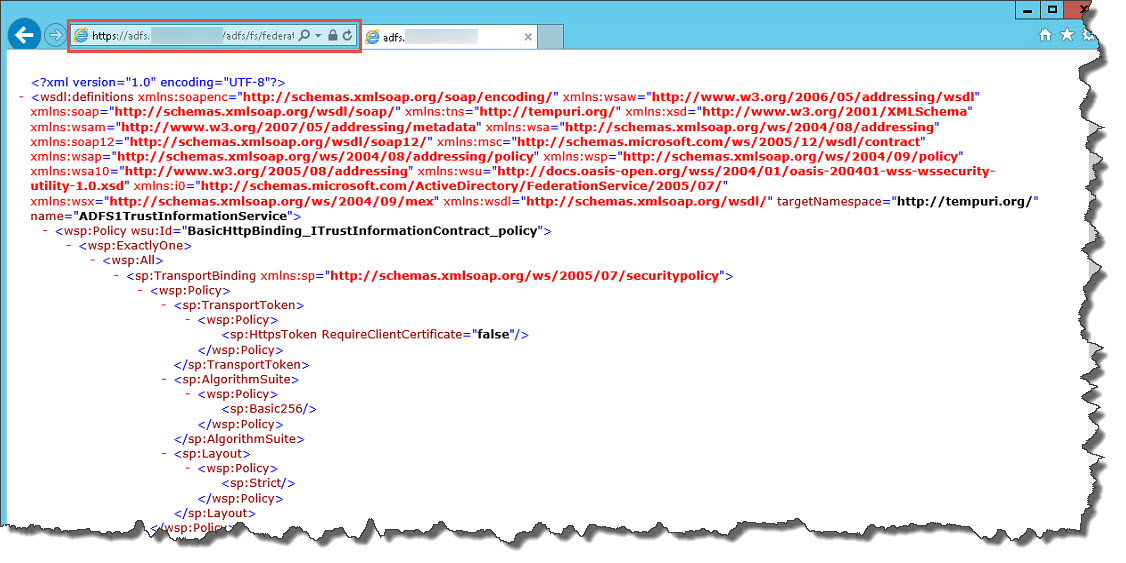
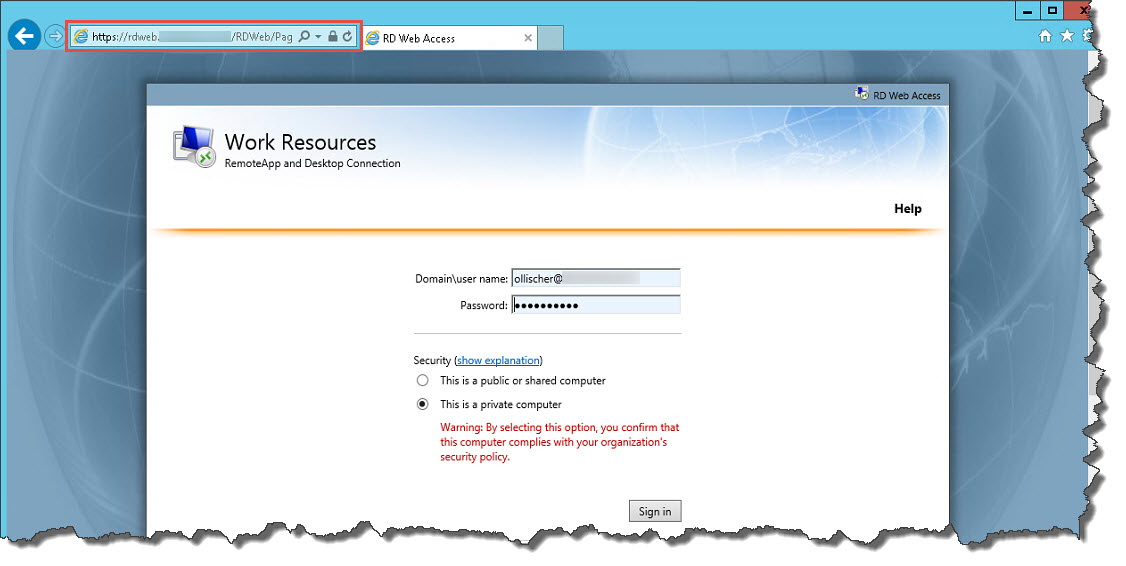
- in the end I verified that both my AD FS and RDWeb deployments still worked by navigating to the corresponding URLs:
- AD FS: https://adfs.domain.com/adfs/fs/federationserverservice.asmx
- RDWeb: https://rdweb.domain.com/rdweb


NetScaler CLI Commands
You have to manually replace the following with your corresponding information:
- 10.0.0.220 with IP address of your internal RD Gateway server
- rdweb.domain.com with the FQDN of your external DNS A-Record (read: Subject Alternative Name)
- YourCertName with the Display Name of your Server Certificate
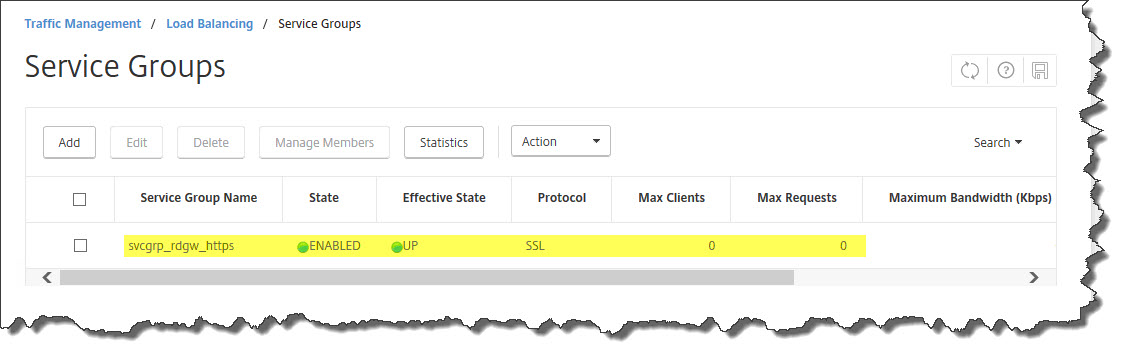
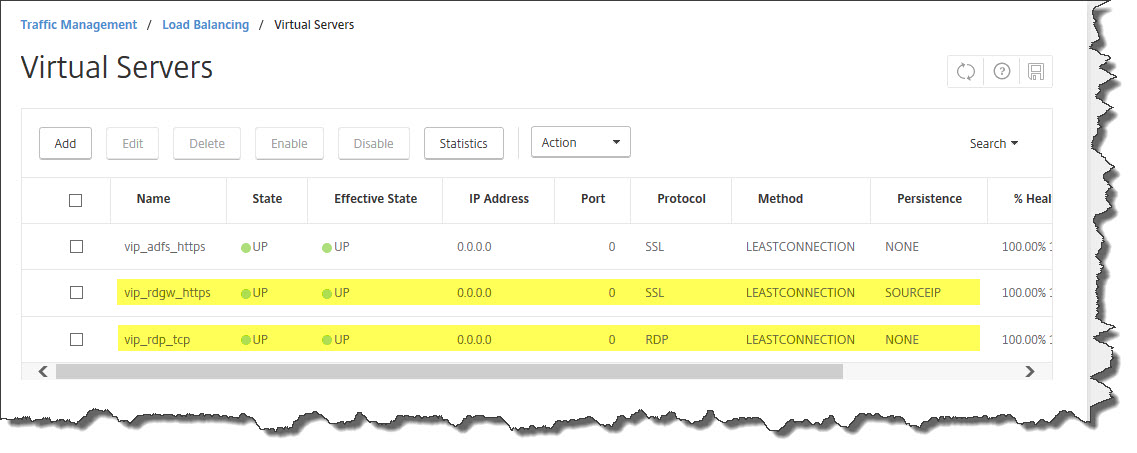
add server rdgw 10.0.0.220
add serviceGroup svcgrp_rdgw_https SSL -maxClient 0 -maxReq 0 -cip DISABLED -usip NO -useproxyport YES -cltTimeout 180 -svrTimeout 360 -CKA NO -TCPB NO -CMP NO
add lb vserver vip_rdgw_https SSL 0.0.0.0 0 -persistenceType SOURCEIP -timeout 5 -cltTimeout 180
add cs action act_rdgw -targetLBVserver vip_rdgw_https
add cs policy rdgw -rule "HTTP.REQ.HOSTNAME.CONTAINS(\"rdweb.domain.com\")" -action act_rdgw
bind lb vserver vip_rdgw_https svcgrp_rdgw_https
bind cs vserver unified -policyName rdgw -priority 80
bind serviceGroup svcgrp_rdgw_https rdgw 443
set ssl vserver vip_rdgw_https -SNIEnable ENABLED
bind ssl serviceGroup svcgrp_rdgw_https -certkeyName YourCertName
bind ssl vserver vip_rdgw_https -certkeyName YourCertName
save ns config
Furthermore you might have to add the following Content Switching configuration according to Jakob Rutski‘s blog article Load Balancing Remote Desktop Gateway with Citrix NetScaler Part 2:
Name: CSW-RDG-Mobile
Action: CSW-RDG-Action
Expression: HTTP.REQ.HEADER(“User-Agent”).CONTAINS(“MSRPC”)
Verify that everything’s working as expected:
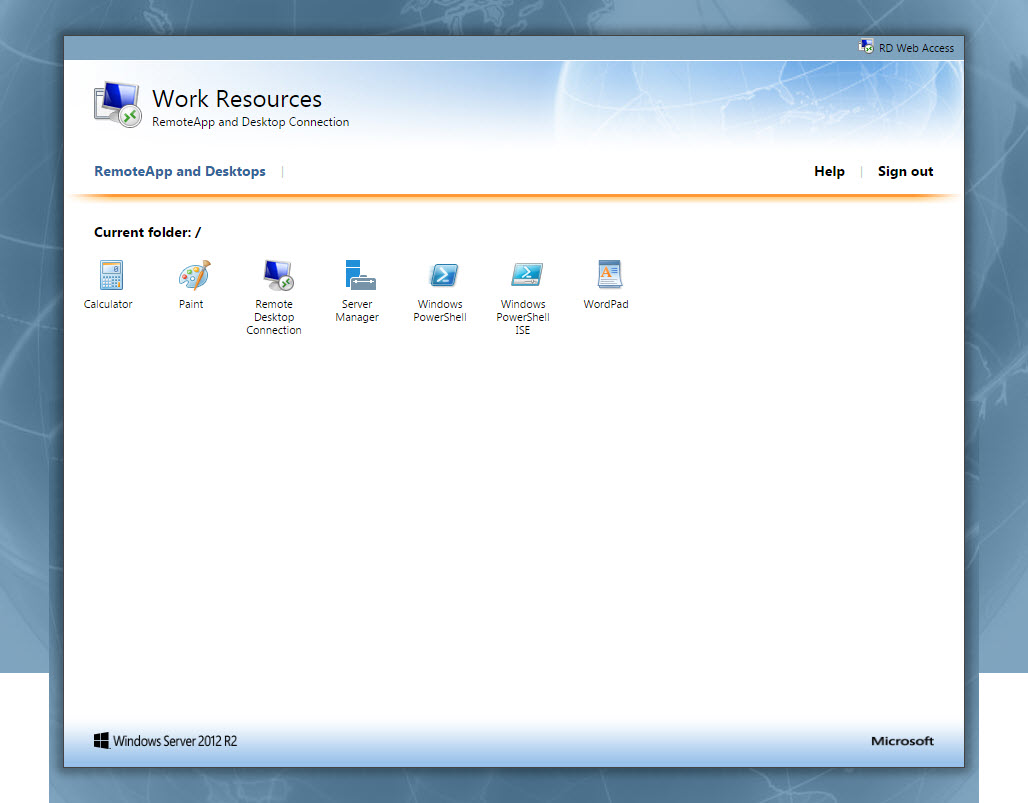
Finally, you could navigate to your newly added RDWeb URL (e.g. https://rdweb.domain.com/RDWeb) and check whether it’s working properly, i.e. you can initiate an RDP session and successfully launch a published RemoteApp:

Further reading:
- XenApp Blog – RDS Gateway and Horizon View behind NetScaler Content Switch
- bretty.me.uk – Load Balancing and Presenting Microsoft RDS 2016 TP5 using Citrix NetScaler Unified Gateway
- Load Balancing Remote Desktop Gateway with Citrix NetScaler
- How-to: RD Gateway behind a NetScaler
- TechNet – Using certificates in Remote Desktop Services
- TechNet – Change published FQDN for Server 2012 or 2012 R2 RDS Deployment [Script]
- Configuring RDS 2012 Certificates and SSO